Goods Rental System
Platform: Windows
Link: Download DEMO-Version (Use free for 30 days)
Price: 19,99 €
Platform: Mac OS
Link to iTunes Store
Platform: Windows
Link: Download DEMO-Version (Use free for 30 days)
Price: 19,99 €
Platform: Mac OS
Link to iTunes Store
Tutorial 1: Program User Manual
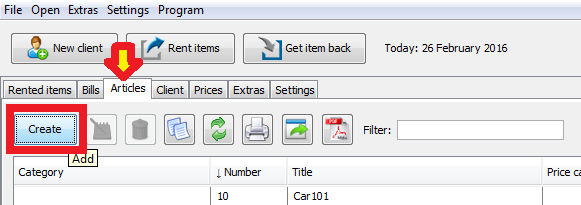
Step 1: Adding Articles
At first you should input in the program the goods you want to lease. To do so open the "Articles" tab. Click "Create". In the window that will open fill in the necessary fields on the new item. Meanwhile you can save any information on the item, e.g.: category, bar-code, state, pcice category, pictures and so on. Click "Save".
WINDOWS:
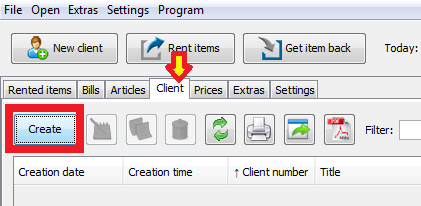
Step 2: Adding Clients
(You can skip this step and perform it later)
In order to input your customers in the program, open the "Client" tab. Press «Create». In the window that will open fill in all the necessary fields on the new customer. Meanwhile you can save any information on the customer, e.g.: contact data, language, picturea and so on. Press the "Save" button.
This list of customer data can easily be updated, printed, saved as a PDF-file and exported in CSV format.
WINDOWS:
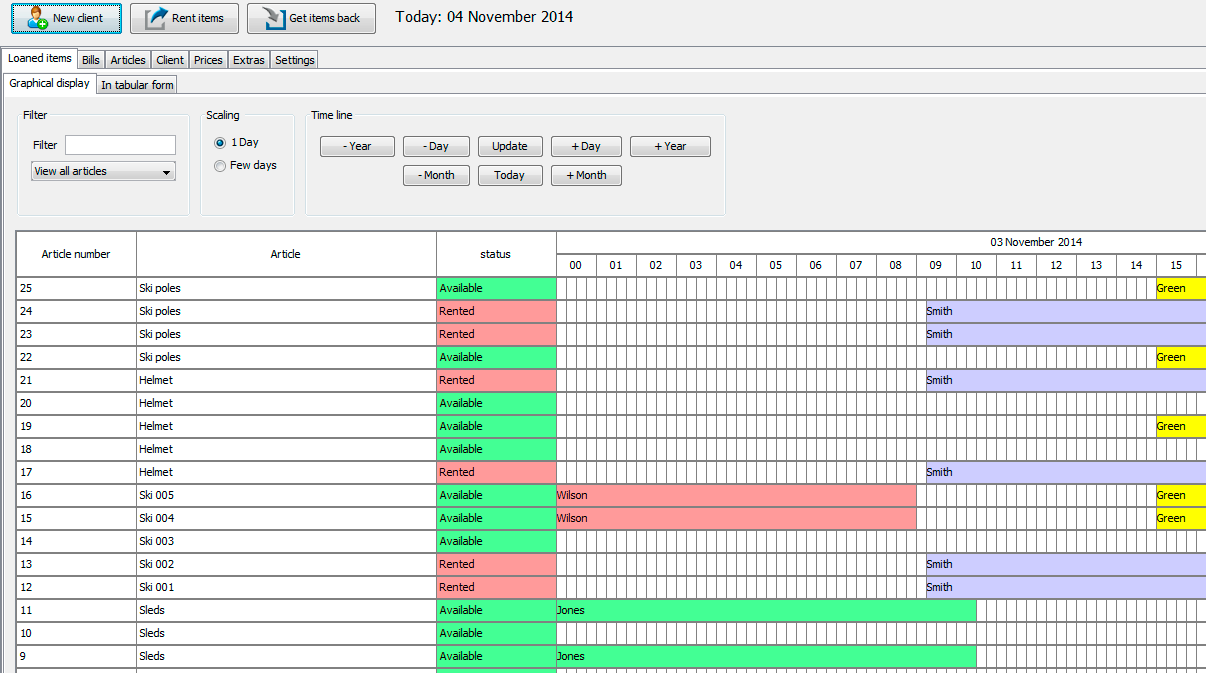
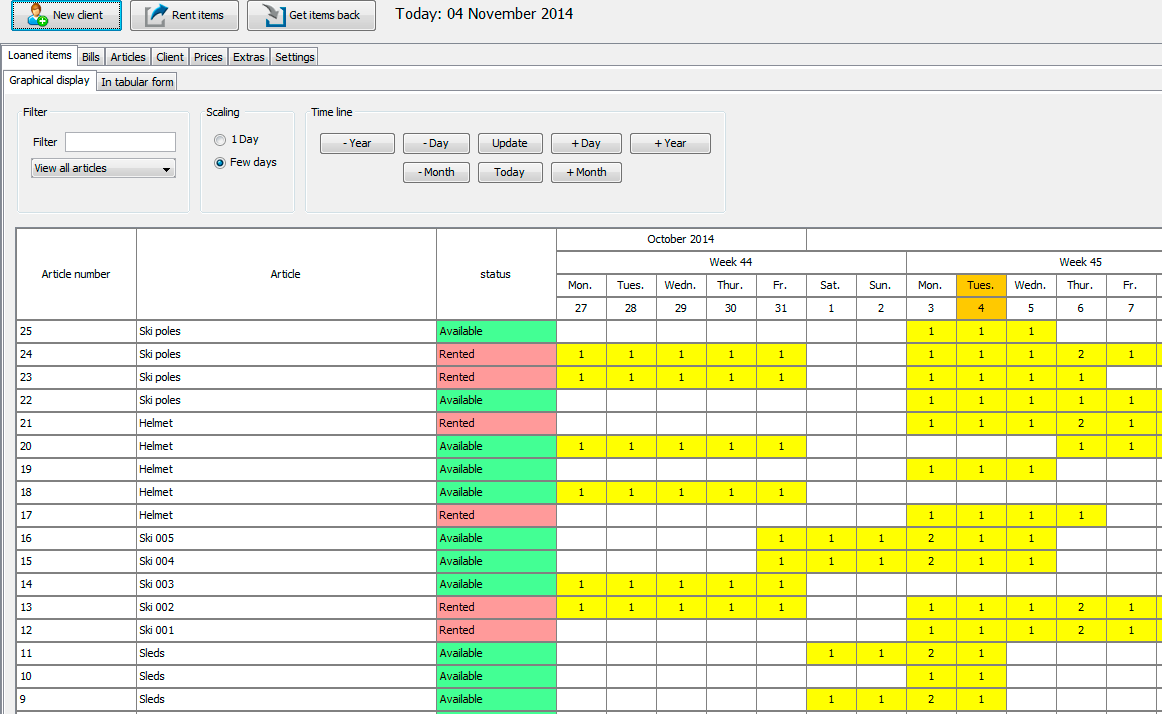
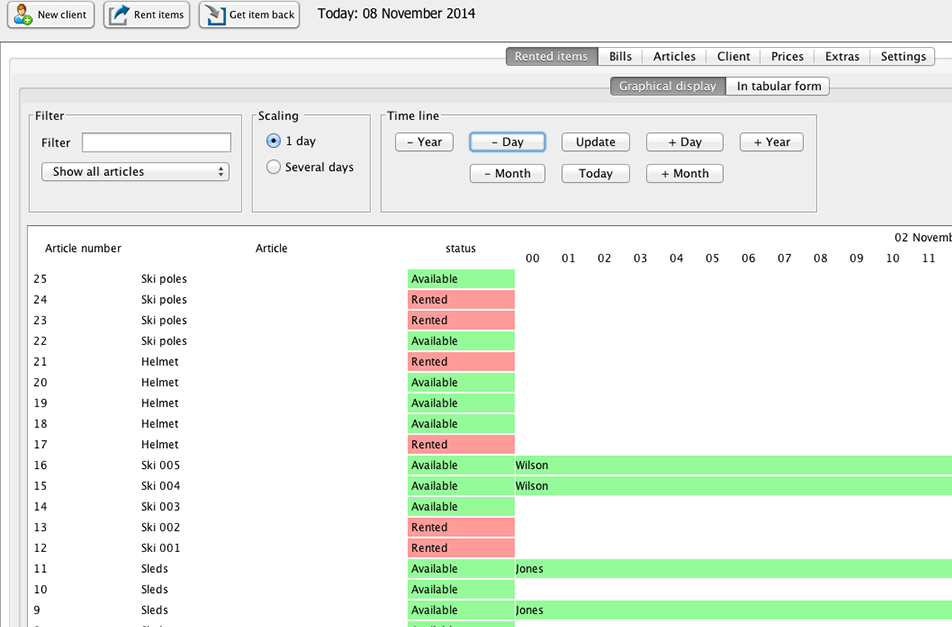
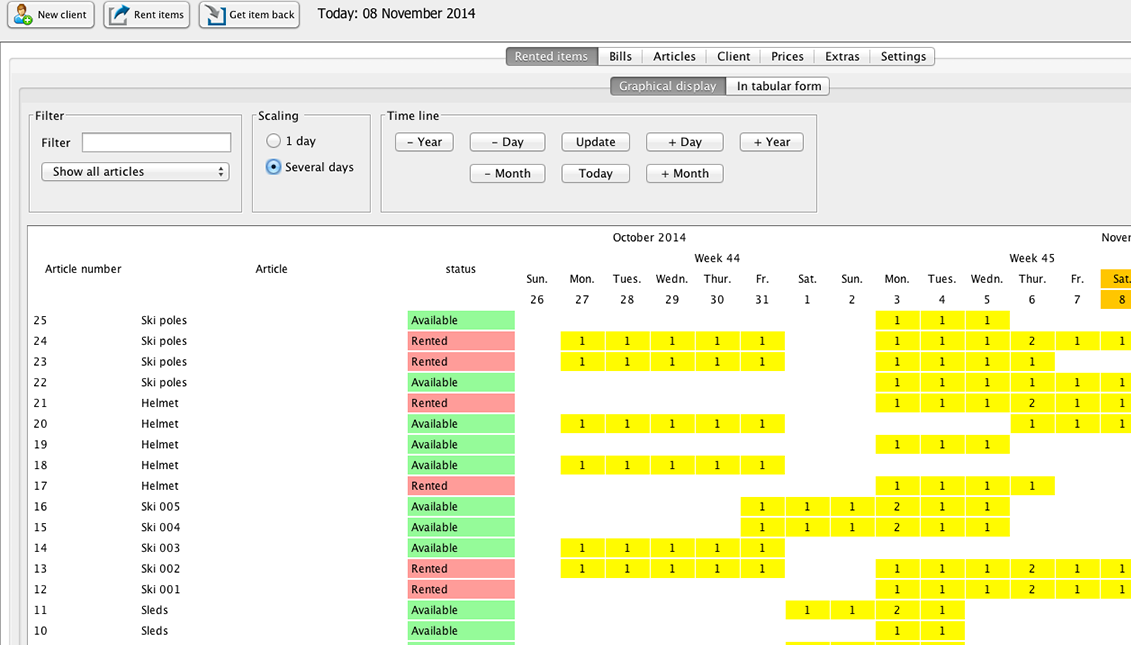
Step 3: Display of Bookings
In the first tab "Rented items" you can see your articles and bookings (in graphic representation and as a table).
WINDOWS:
graphical display
tabular form
MAC OS:
graphical display
tabular form
Step 4: Renting of Articles
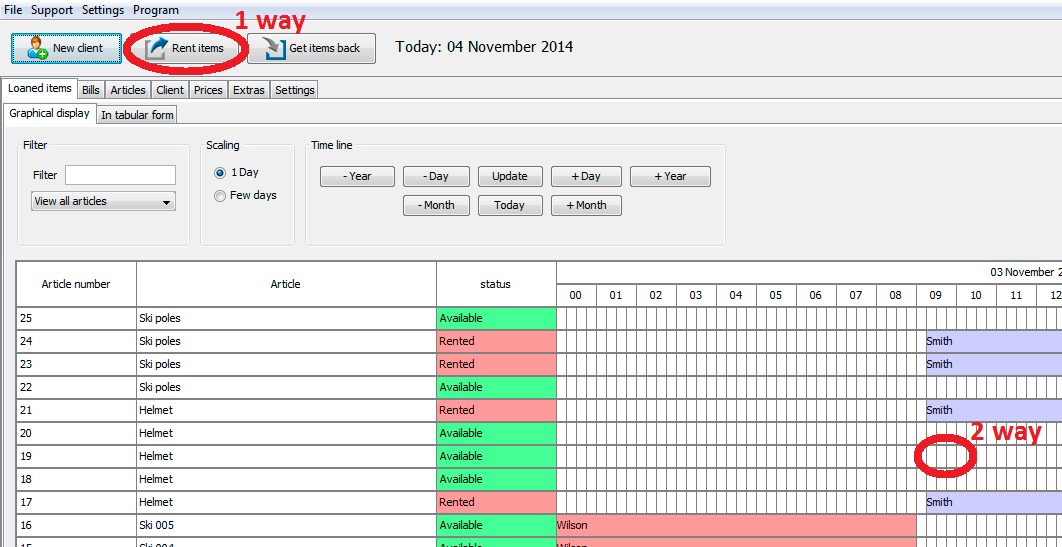
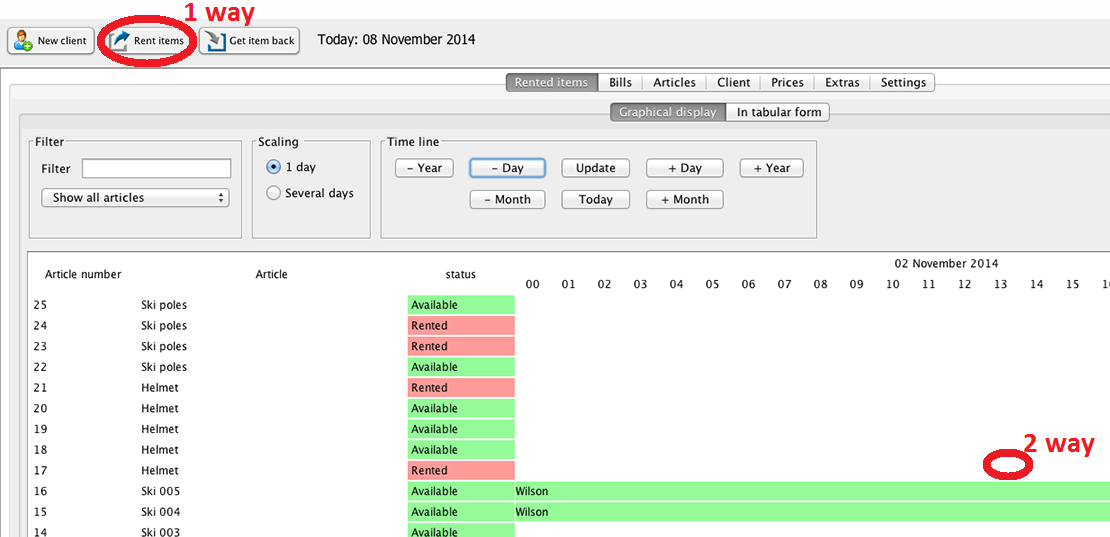
There are three ways to rent the articles:
Way 1:
Press the "Rent items" button (in the upper part).
Way 2:
Open the first tab "Rented items" –> "Graphical display". Just select the item and click the day when you want to lease this item. In the window that will open fill in the necessary fields and save the changes.
WINDOWS:
MAC OS:
Way 3:
Open the first tab "Rented items" –> "Tabular form". Click "Create". In the window that will open fill in the necessary fields and save the changes.
WINDOWS:

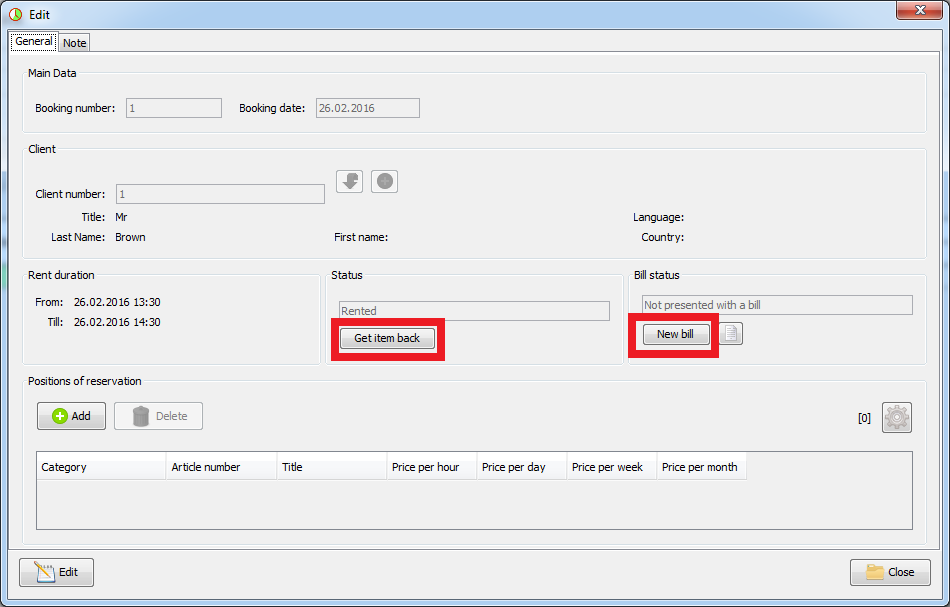
Step 5: Get Item Back
In order to get your item back - click the button (in the upper part) "Get item back". Select the necessary item. In the window that will open in the area «Status» click the button (in the centre) "Get item back".
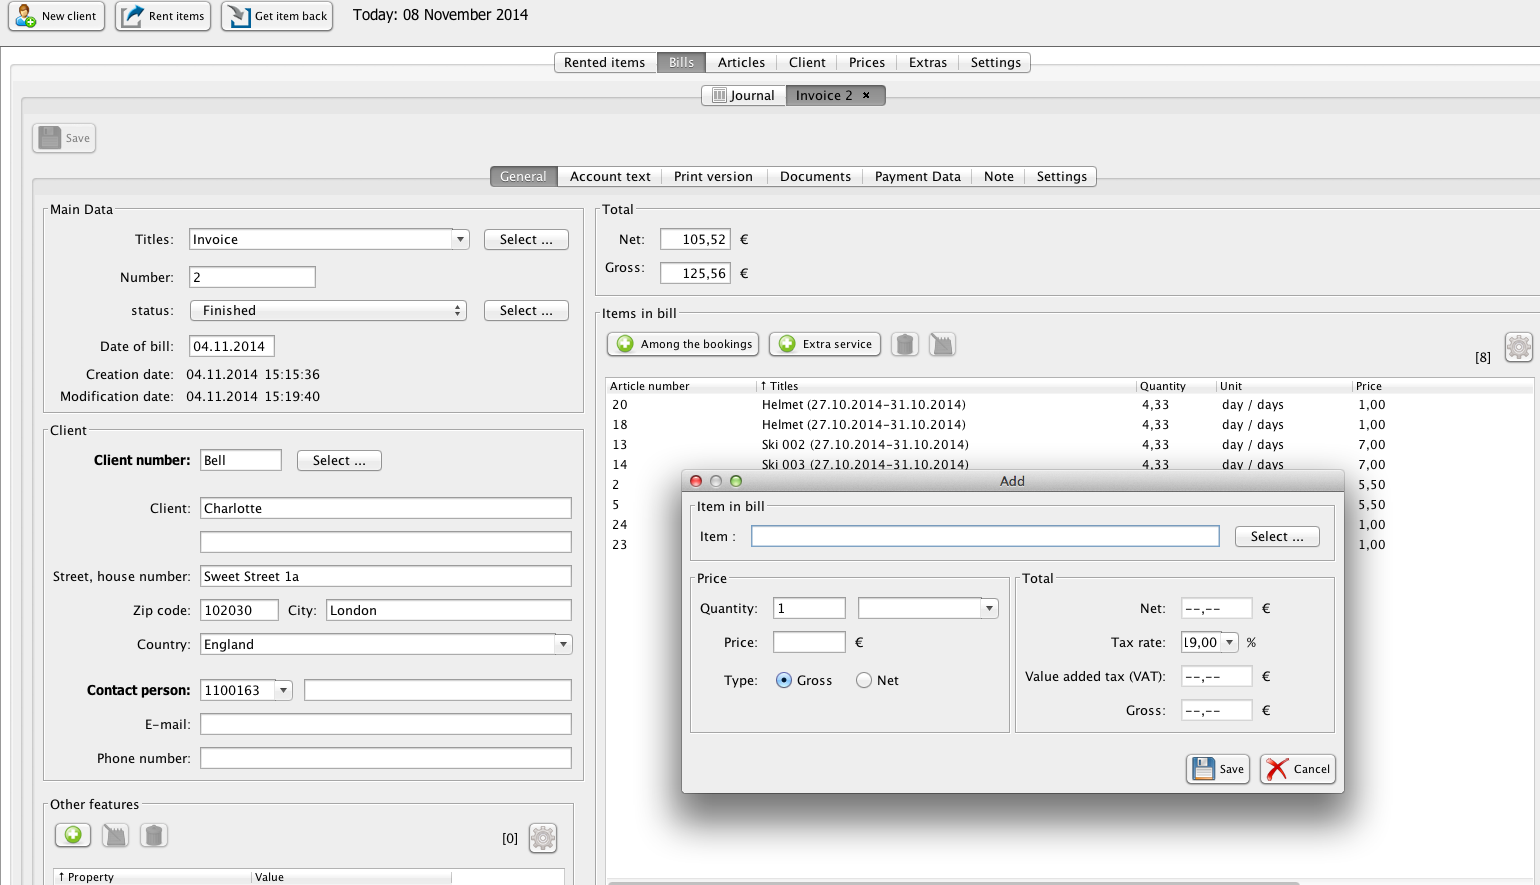
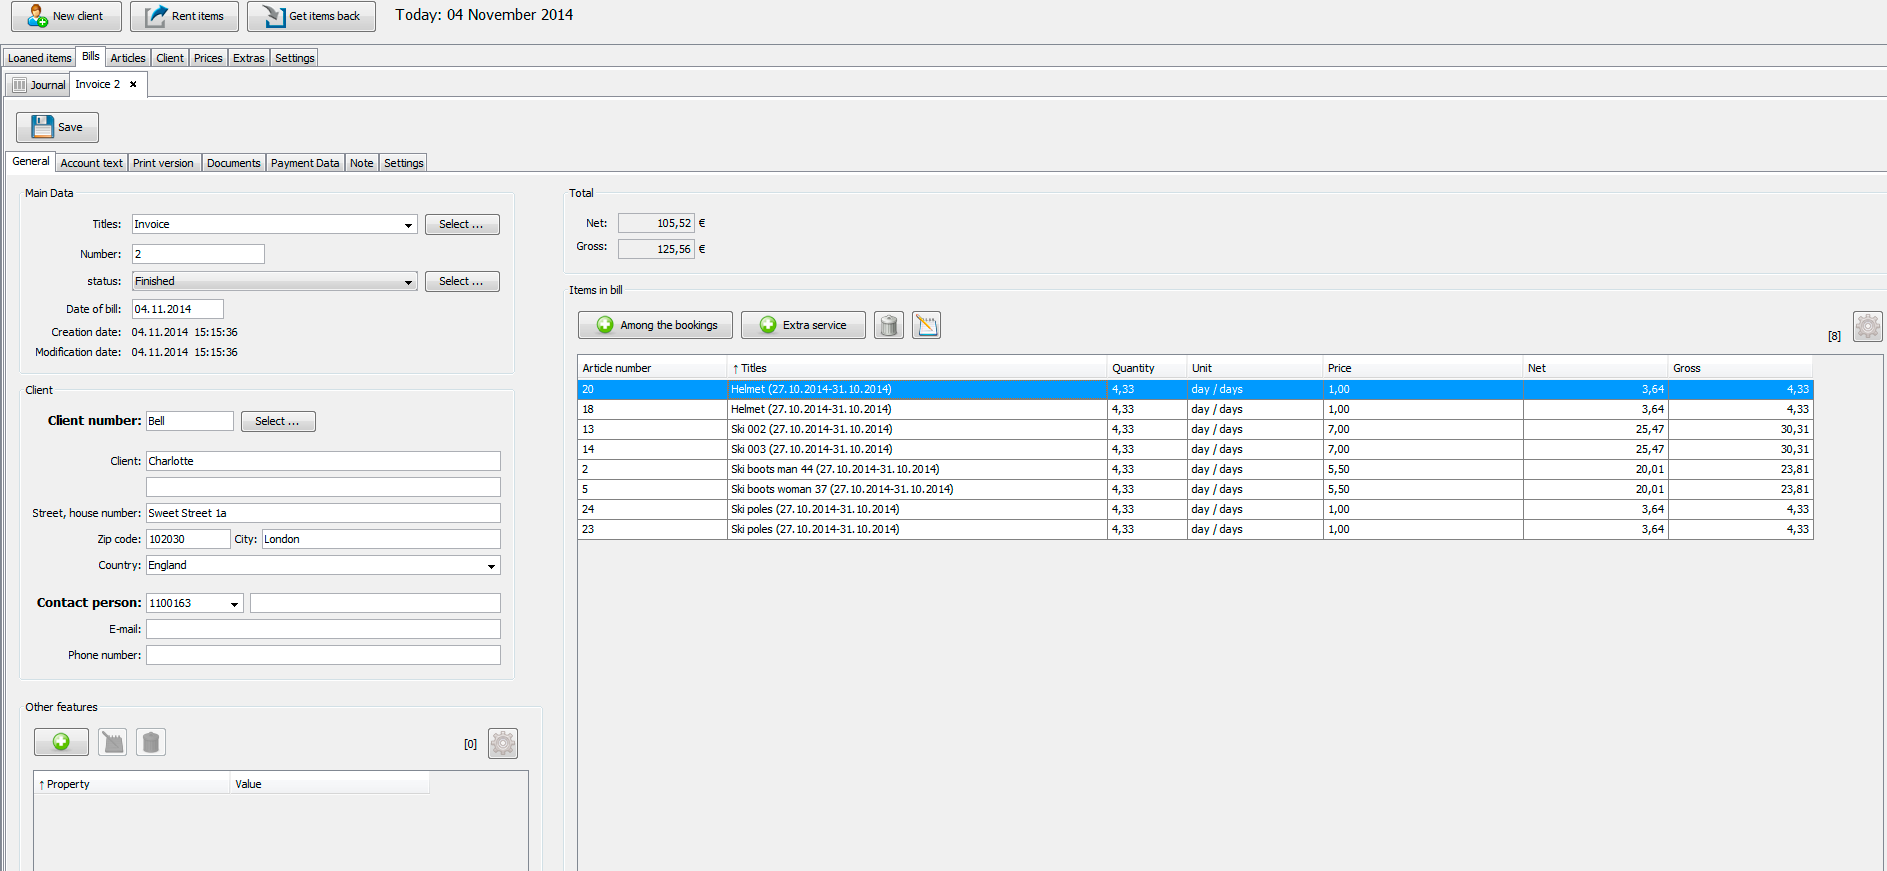
In case of necessity you can create a new invoice for the customer. To do so in the area "Bill status" click "New bill" and in the window that will open fill in the information for the invoice. Save the invoice.
WINDOWS:
MAC OS: