Universal Database
Platform: Windows
Link: Download DEMO-Version (Use free for 30 days)
Price: 49,99 €
Platform: Mac OS
Link to iTunes Store
Platform: Windows
Link: Download DEMO-Version (Use free for 30 days)
Price: 49,99 €
Platform: Mac OS
Link to iTunes Store
Tutorial 1: Main steps to set the program
Stage 1 Determine the structure of the object
Step 1 Adding the name and type of the object
Step 2 Adding attributes of the object
Step 3 Add further attributes to your object
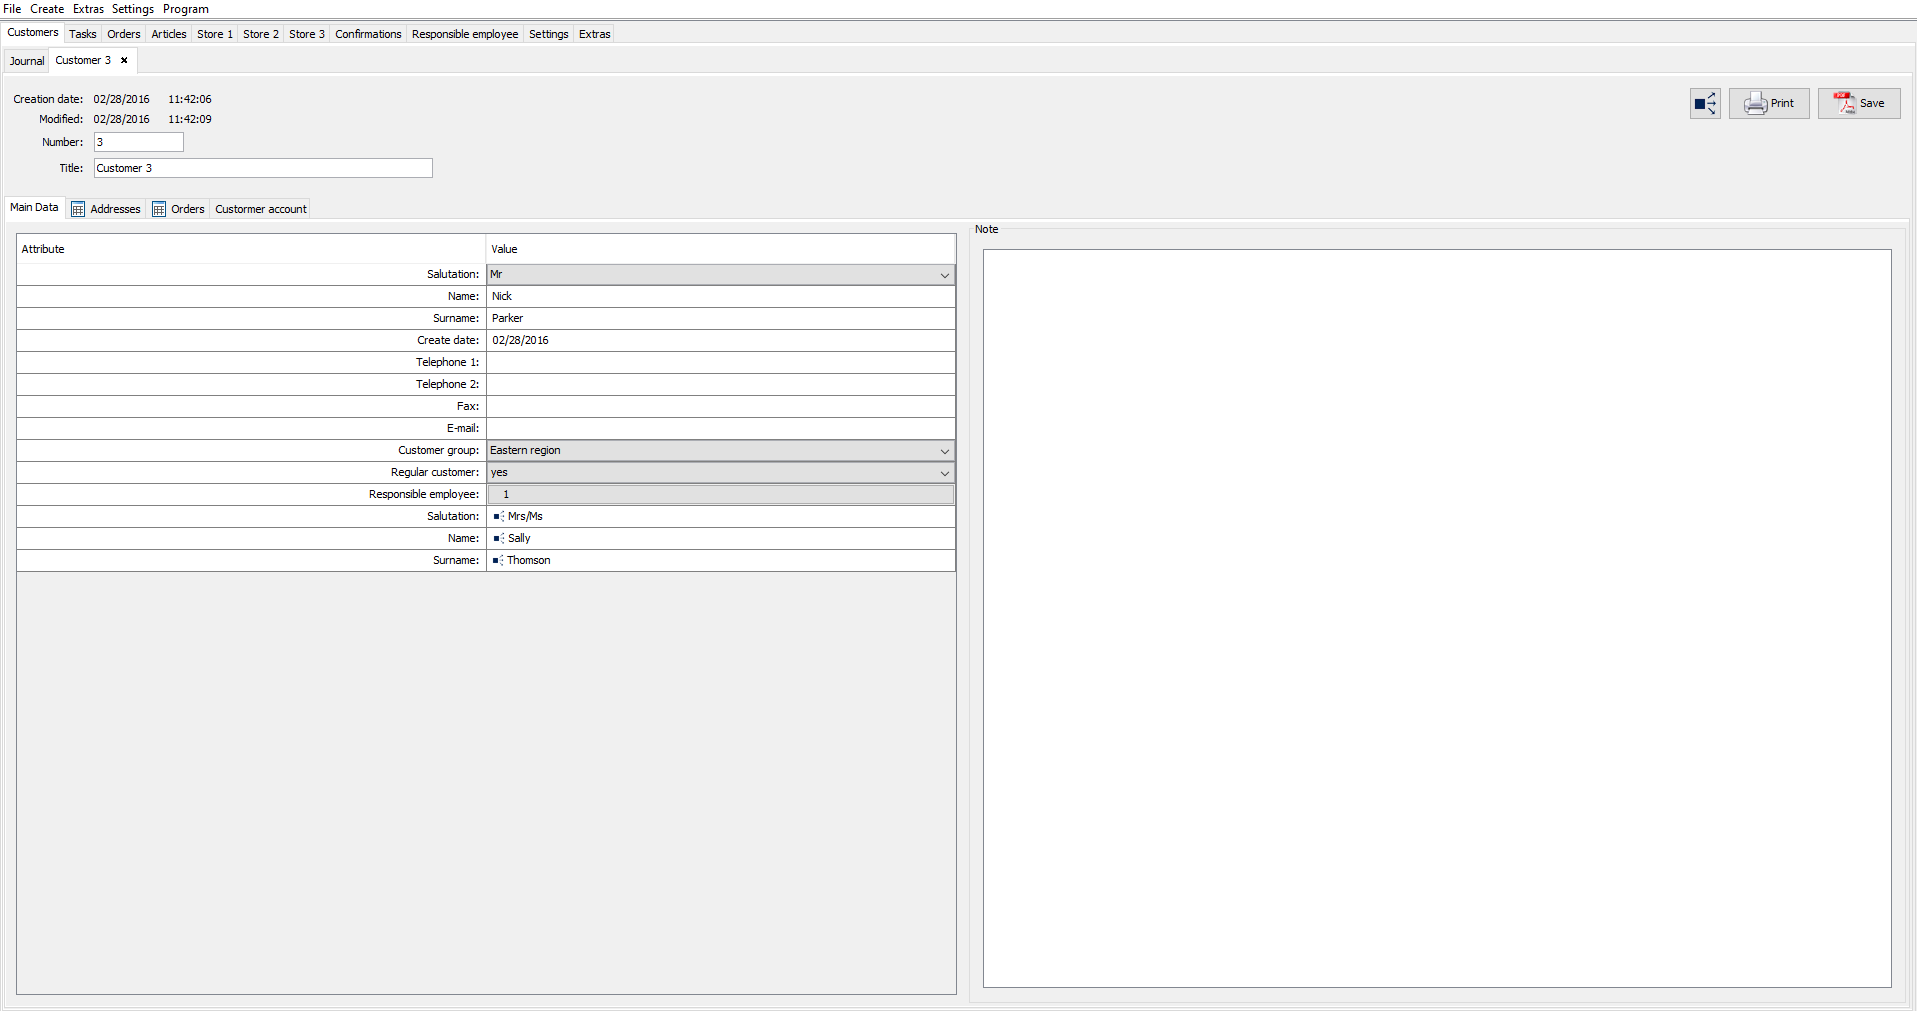
Stage 2 Fill in the information of the object
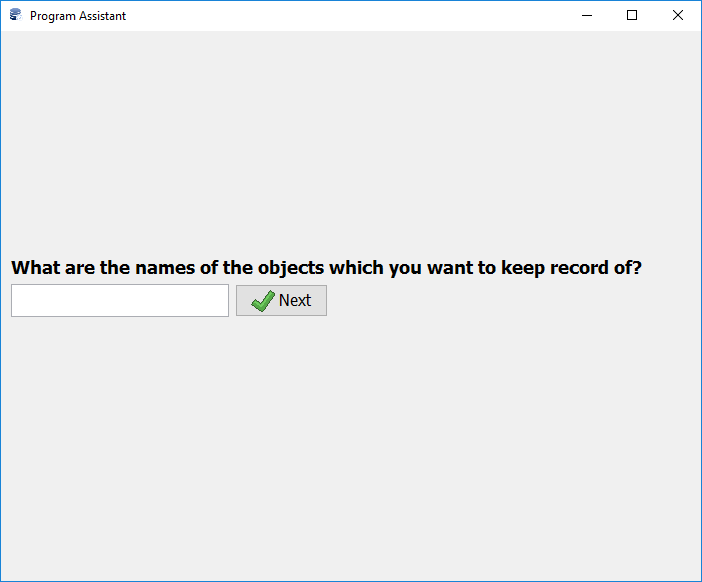
The first steps to fill in your database
(You can also use the program assistant to set the program)
WINDOWS:
The program allows you to keep track of different objects. To get started you schould set your objects. Adding an object to the program is carried out in two stages:
Stage 1 Determine the structure of the object
When you create your object, you must first define the structure of the object.
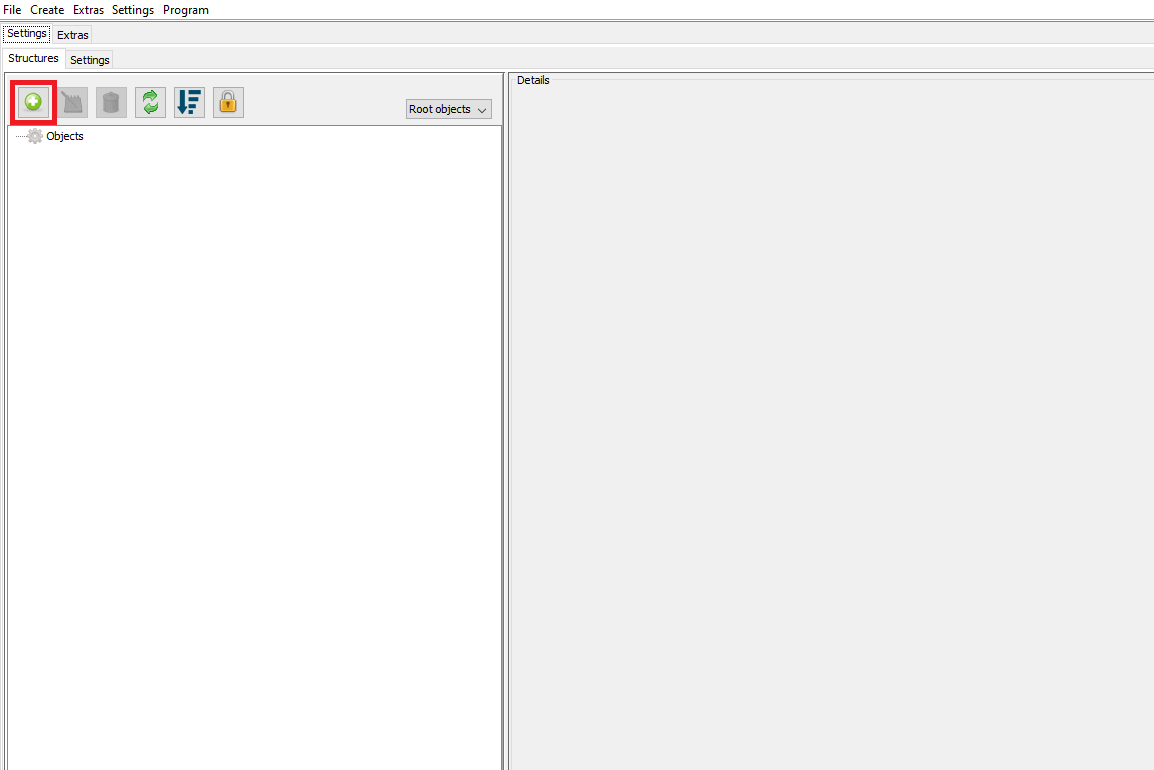
Step 1 Adding the name and type of the object
1) In the "Settings" -> "Structures", click on the green plus.
WINDOWS:
2) In the newly opened window, fill in the fields. Specify a "title" of the object. Specify a "tab name" for this object.
WINDOWS:
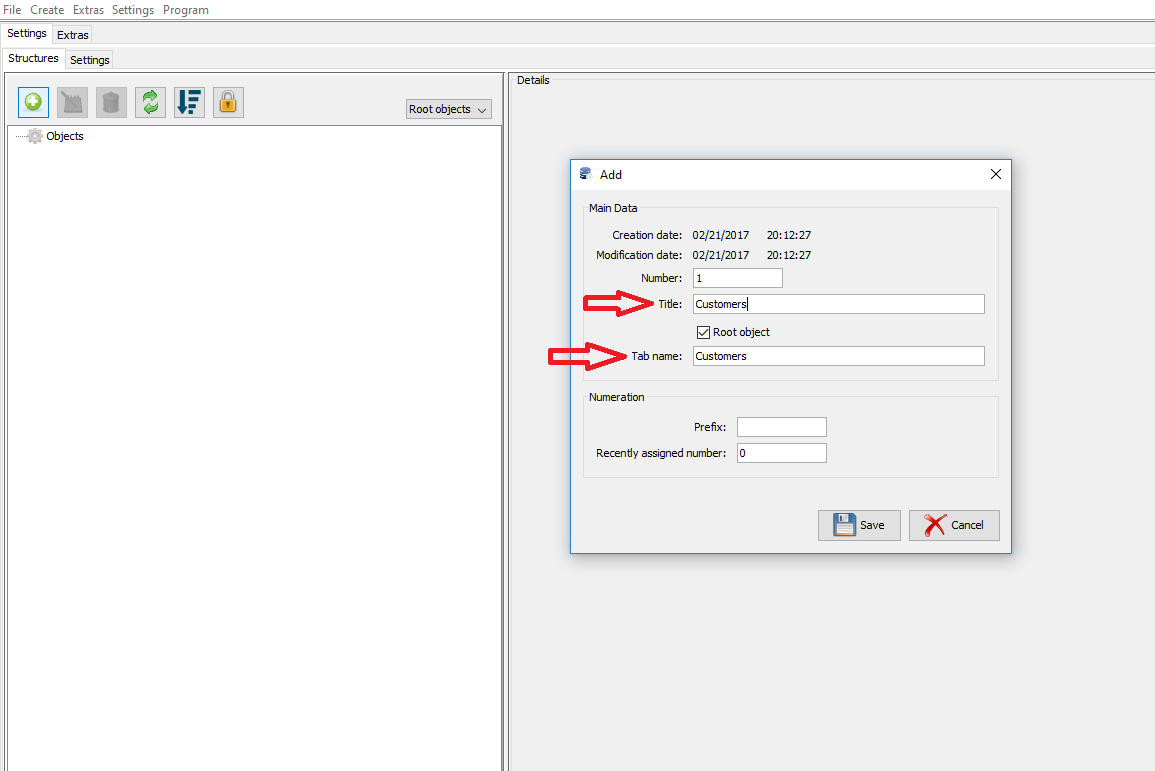
The object can be noted as a "root object".
WINDOWS:
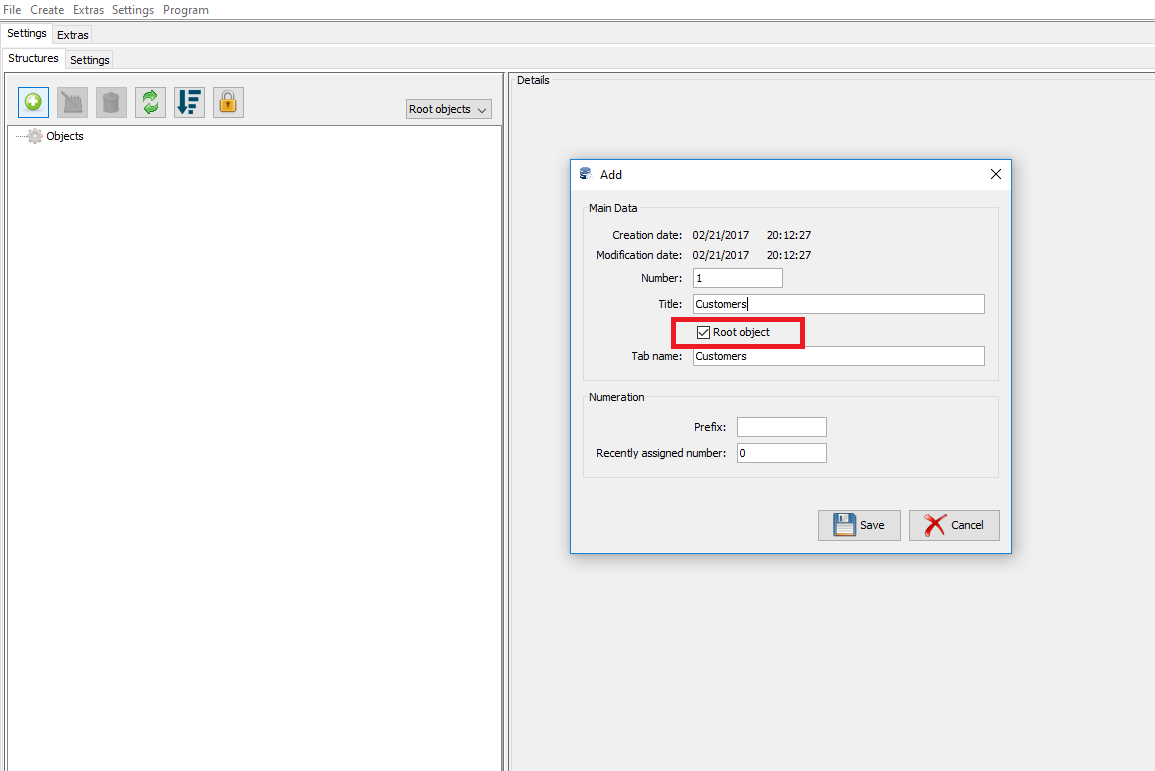
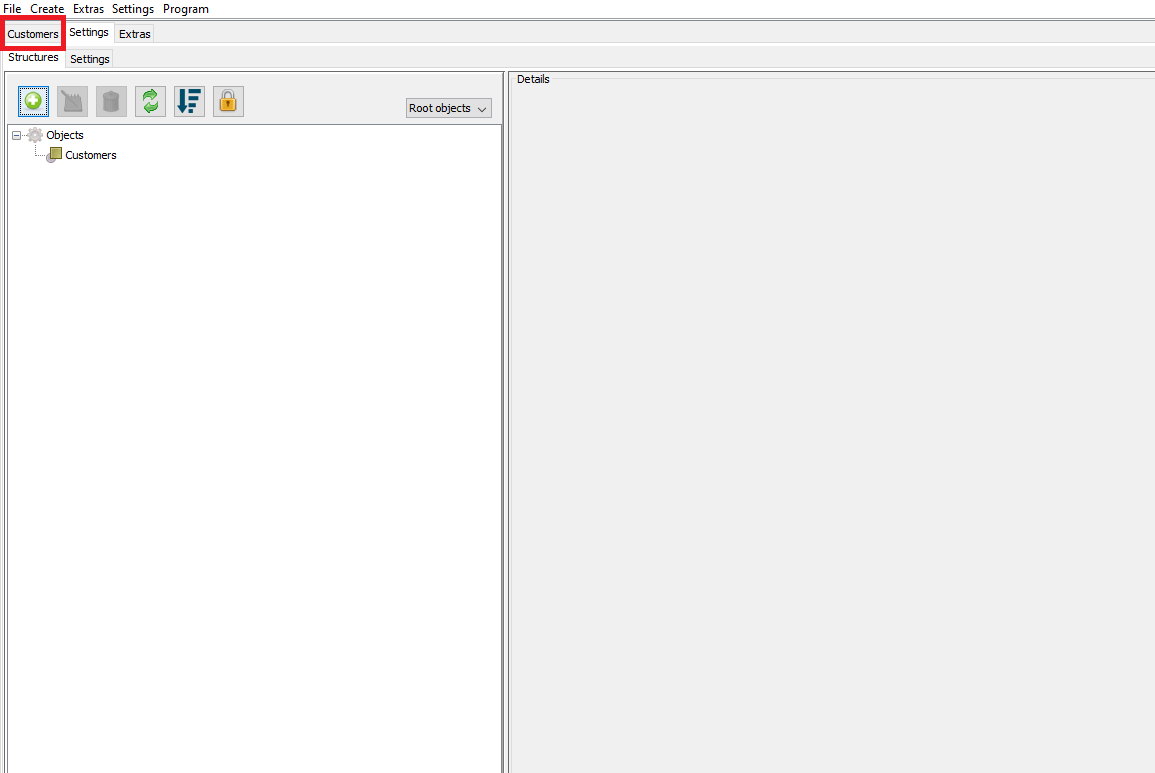
A root object will get its own tab.
WINDOWS:
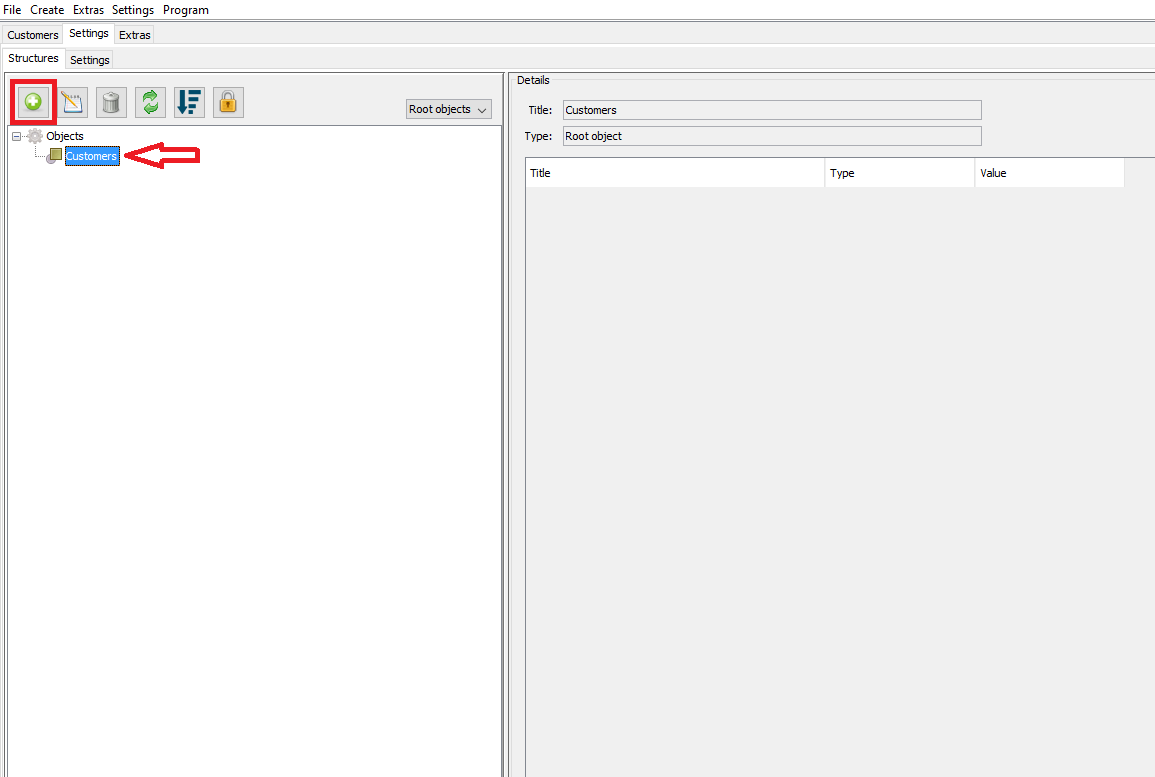
Step 2 Adding attributes of the object
For each object you can add different attributes. You should do the following:
1) Select the object which you want to add the attribute to and click on the green plus.
WINDOWS:
2) In the newly opened window, select the type of attribute and complete the fields.
WINDOWS:
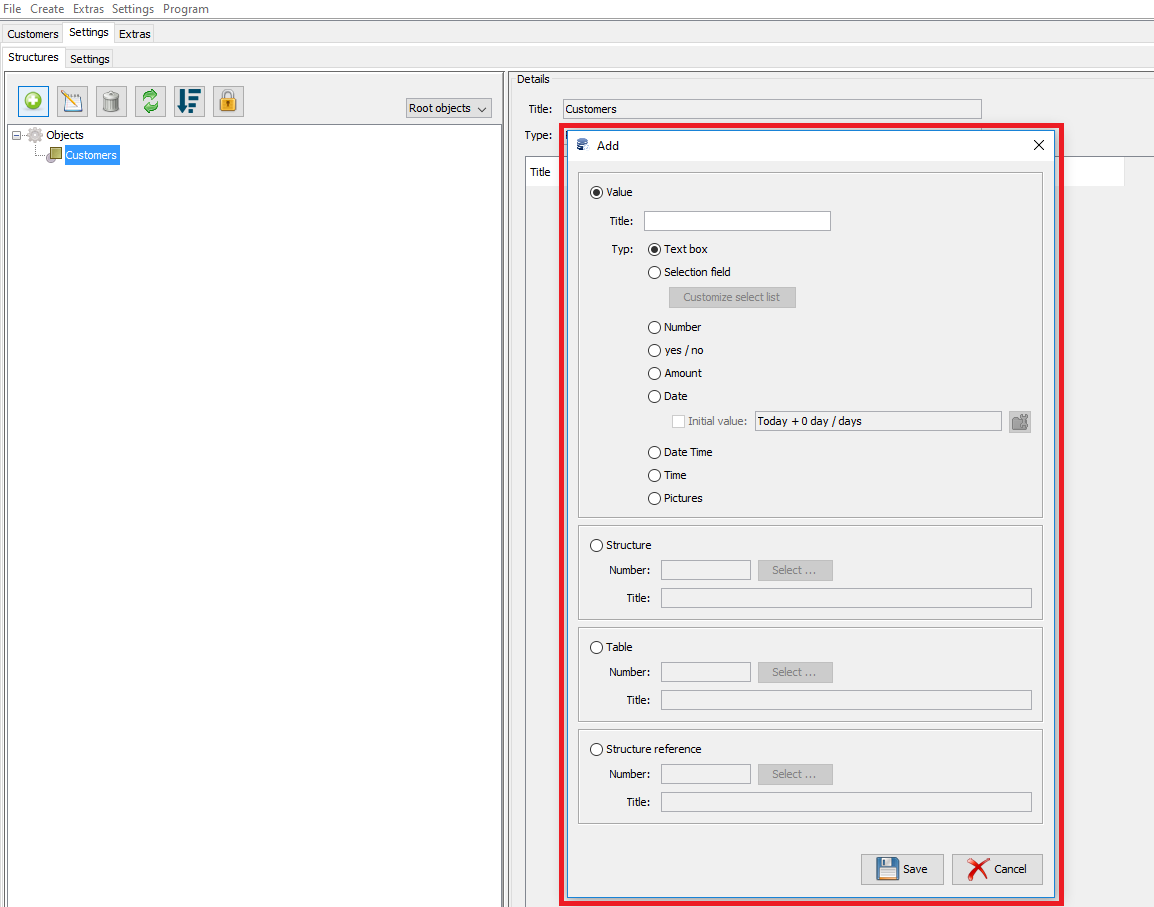
Attributes can be:
ordinary value, structure, table, and a structure reference (learn more about the possible types of attribute here)
Note: the names of attributes can not be renamed! If it is necessary to correct the name of the attribute, you have to remove the attribute and recreate it.
Step 3 Add further attributes to your object
Note: new attributes can be added at any time.
Stage 2 Fill in the information of the object
WINDOWS:
WINDOWS: