Small Business Manufacturing
Platform: Windows
Link: Download DEMO-Version (Use free for 30 days)
Price: 39,99 €
Platform: Mac OS
Link to iTunes Store
Platform: Windows
Link: Download DEMO-Version (Use free for 30 days)
Price: 39,99 €
Platform: Mac OS
Link to iTunes Store
Tutorial 1: Main Steps to Set the Program
This chapter describes how to start working with the program "Small Business Manufacturing".
Step 2: Production Template Creation
Step 1: Adding Articles
You can skip this step and do it later at the stage of production template creation (step 2) or production stage (step 4).
First put all your goods to the program.
1) Open the “Articles” tab –> the ”Journal” tab.
2) Click the ”Create” button.
WINDOWS:
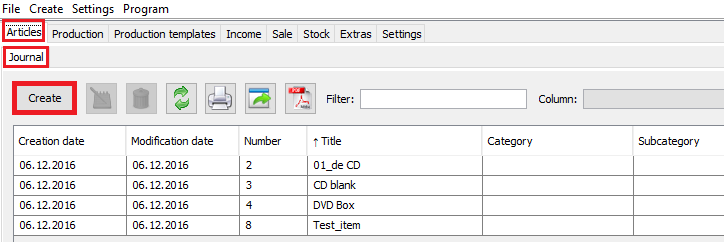
3) In the newly opened window fill in all the necessary fields on a new item. You can save any information concerning the item, e.g.: category, sub-category, status, minimal quantity, pictures, description and so on.
4) Press the ”Save” button.
WINDOWS:

Step 2: Production Template Creation
You can skip this step and perform your production (step 2) without any template.
To fasten the production process you can create different production templates and simple use them at the production stage.
To create a production template:
1) Open the “Production templates” tab.
2) Click the “Create” button.
3) Fill in the necessary information about the articles, which are needed to be used in this production.
WINDOWS:
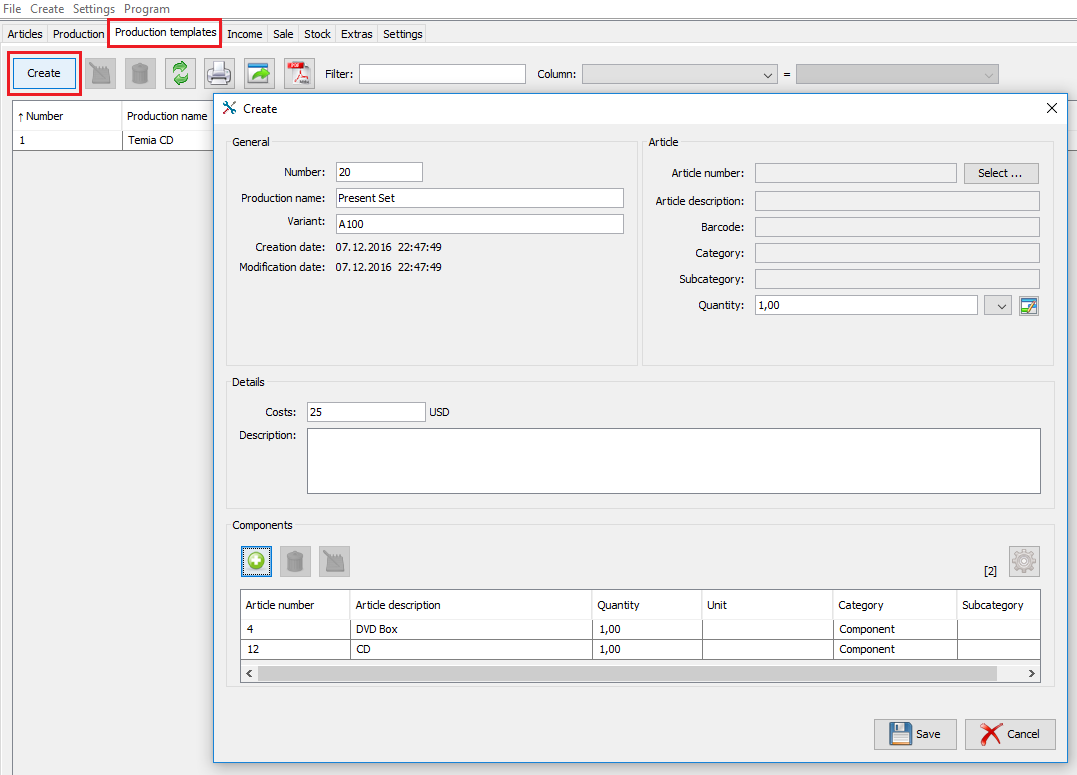
At this step you can create new articles.
WINDOWS:

Step 3: Adding Items to Stock
To start the production your goods should be added to the stock.
There are three ways to do it:
Way 1:
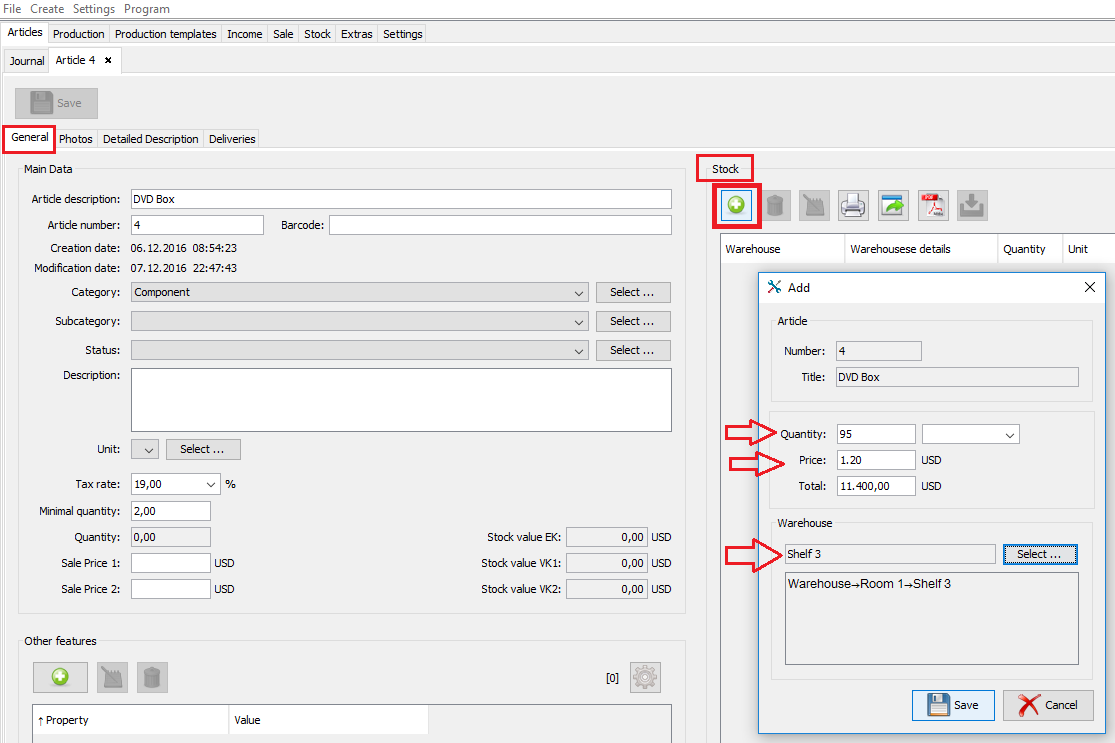
1) Open the ”Articles” tab –> the ”Journal” tab.
2) Select your “YOUR item”.
WINDOWS:
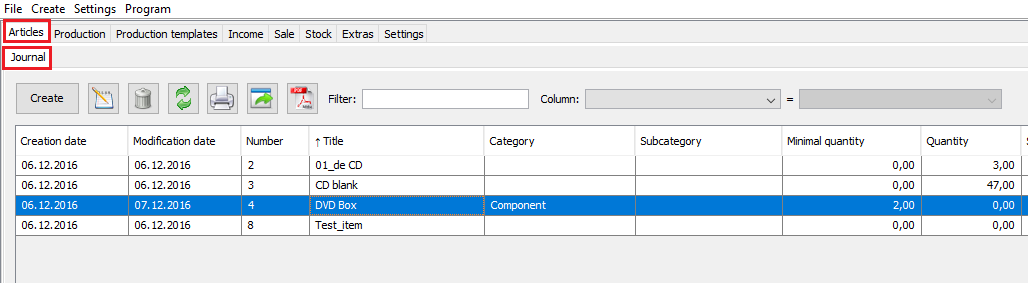
3) A new window with the article information will be opened. In the tab “General” in the area “Stock” click “plus”.
4) Specify the item quantity and the storage place.
WINDOWS:
Way 2:
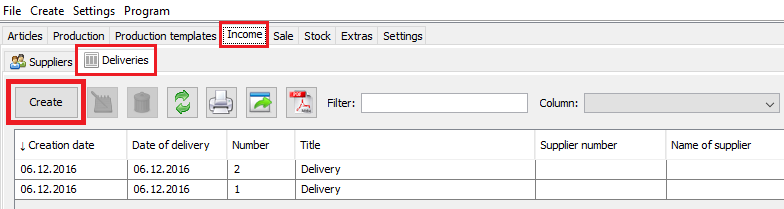
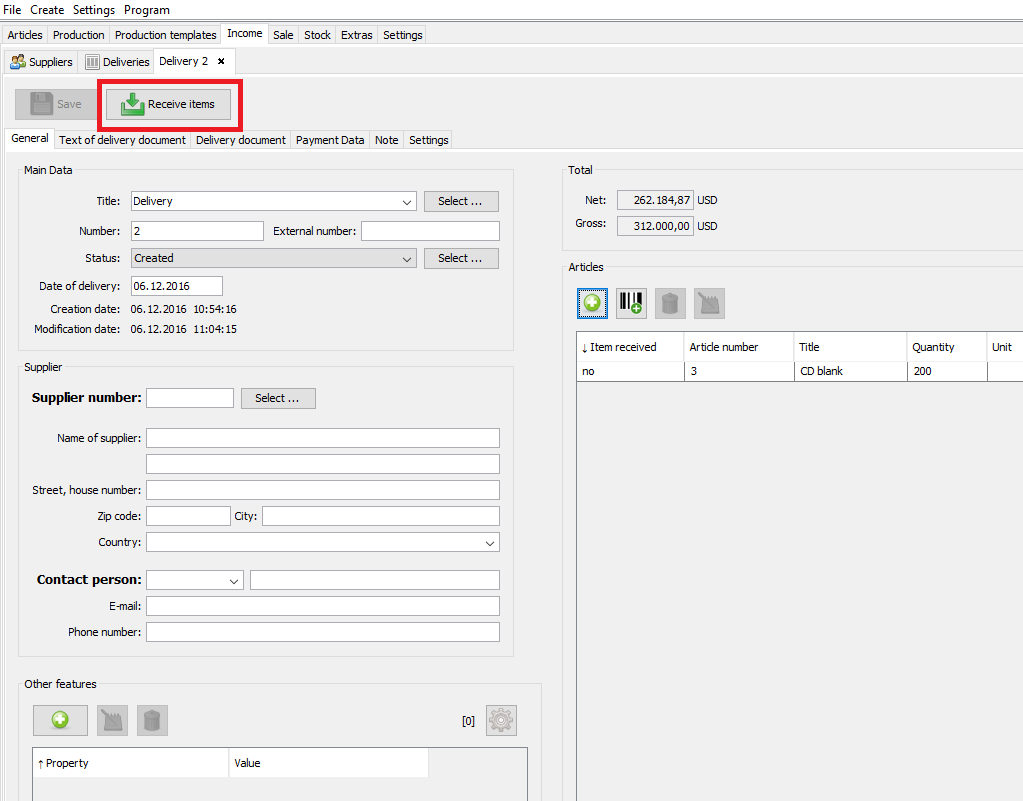
1) Open the “Income” tab –> the “Deliveries” tab.
2) Click the “Create” button.
WINDOWS:
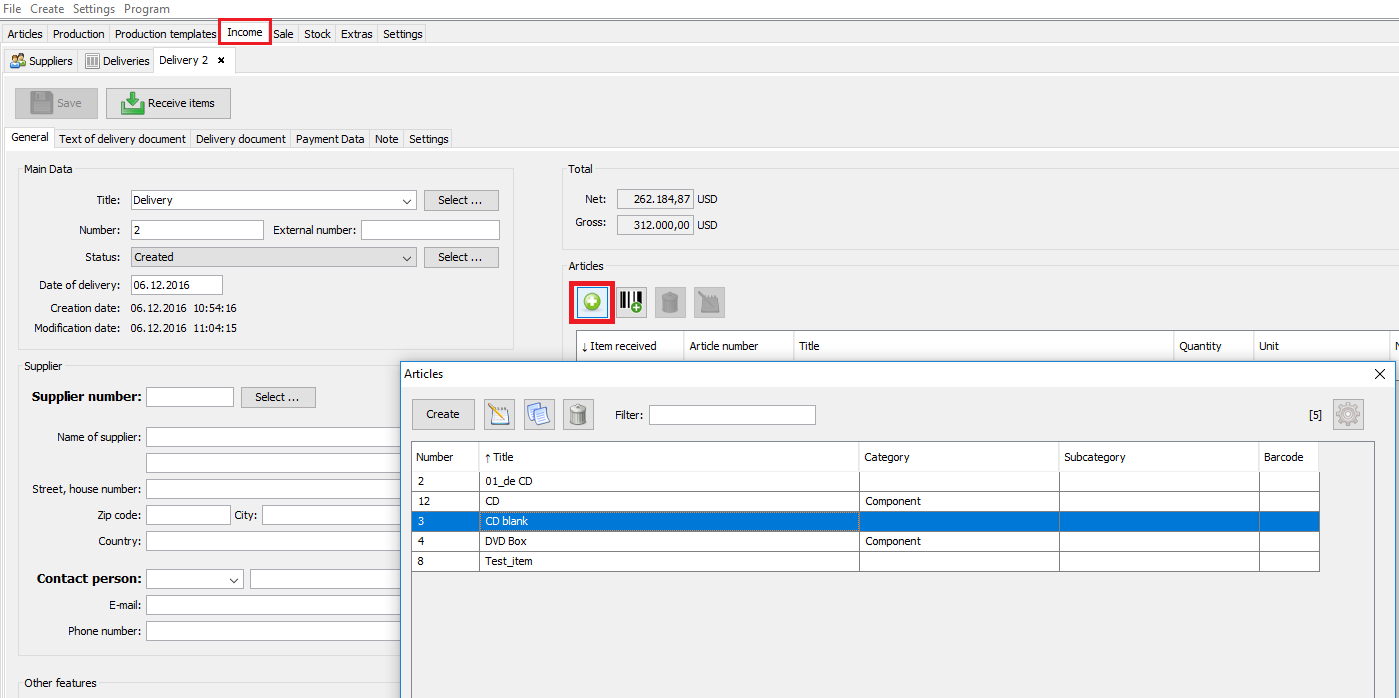
3) In the newly opened window fill in all the necessary fields. In the “Articles” area click “plus”.
4) Select the goods from the list.
WINDOWS:
5) Specify the quantity and the price.
6) Press the “Save” button.
WINDOWS:
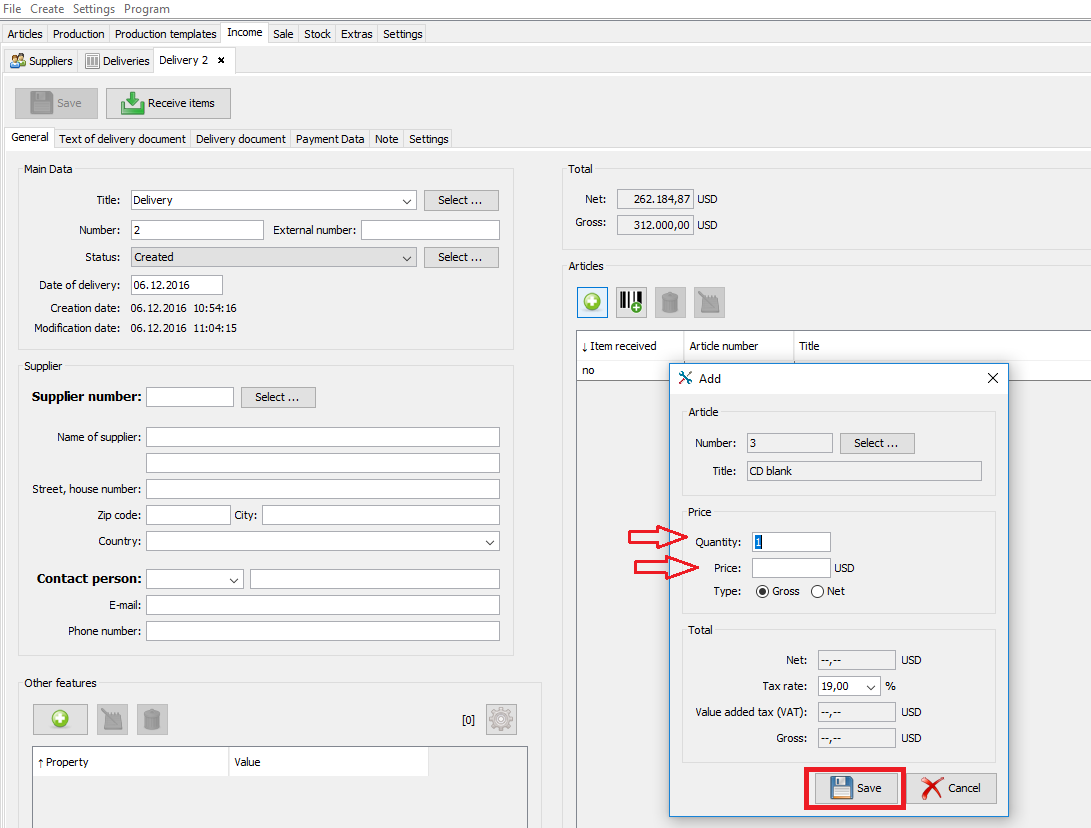
Note: As soon as the articles are added to the delivery and the delivery is saved the articles do not automatically showed up in the stock. They will only appear in the stock after clicking the button “Receive items”. Meanwhile they will be marked in the delivery as received.
WINDOWS:
Way 3:
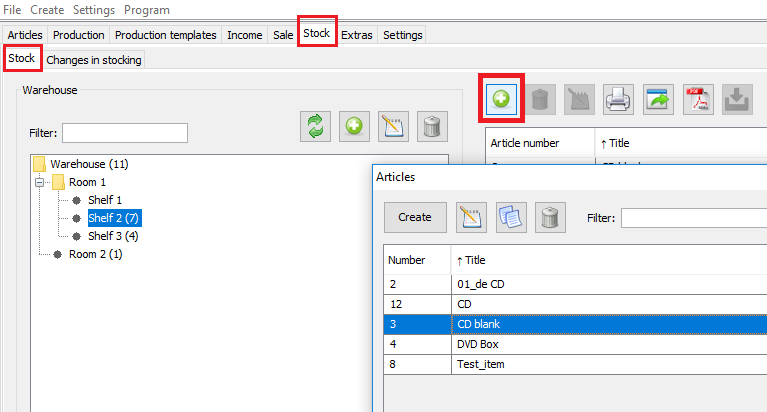
There is also an option of adding goods to stock directly in the context of their storage place:
1) Open the “Stock” tab.
2) Select the place you want.
3) Click “plus”.
4) Select the goods from the list.
WINDOWS:
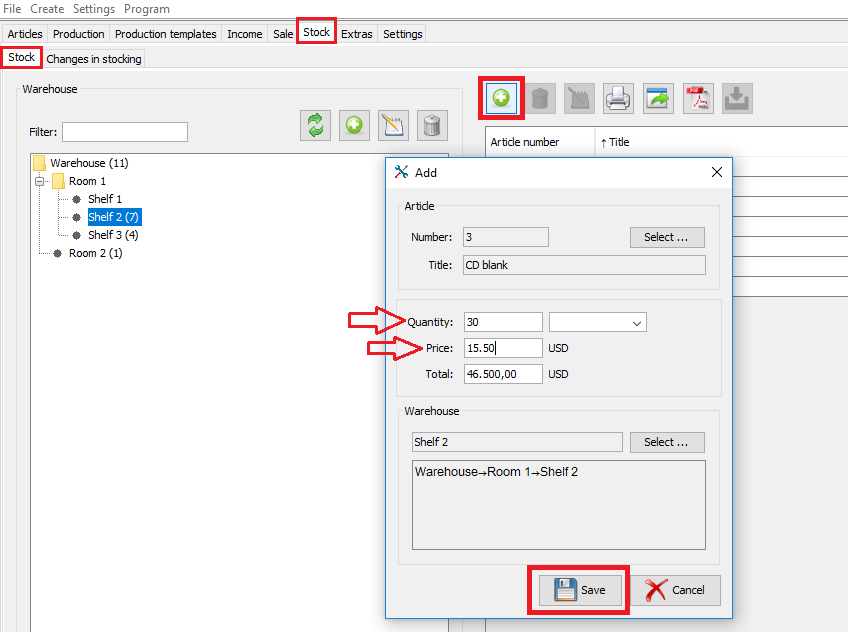
5) Specify the quantity and the price.
5) Press the “Save” button.
WINDOWS:
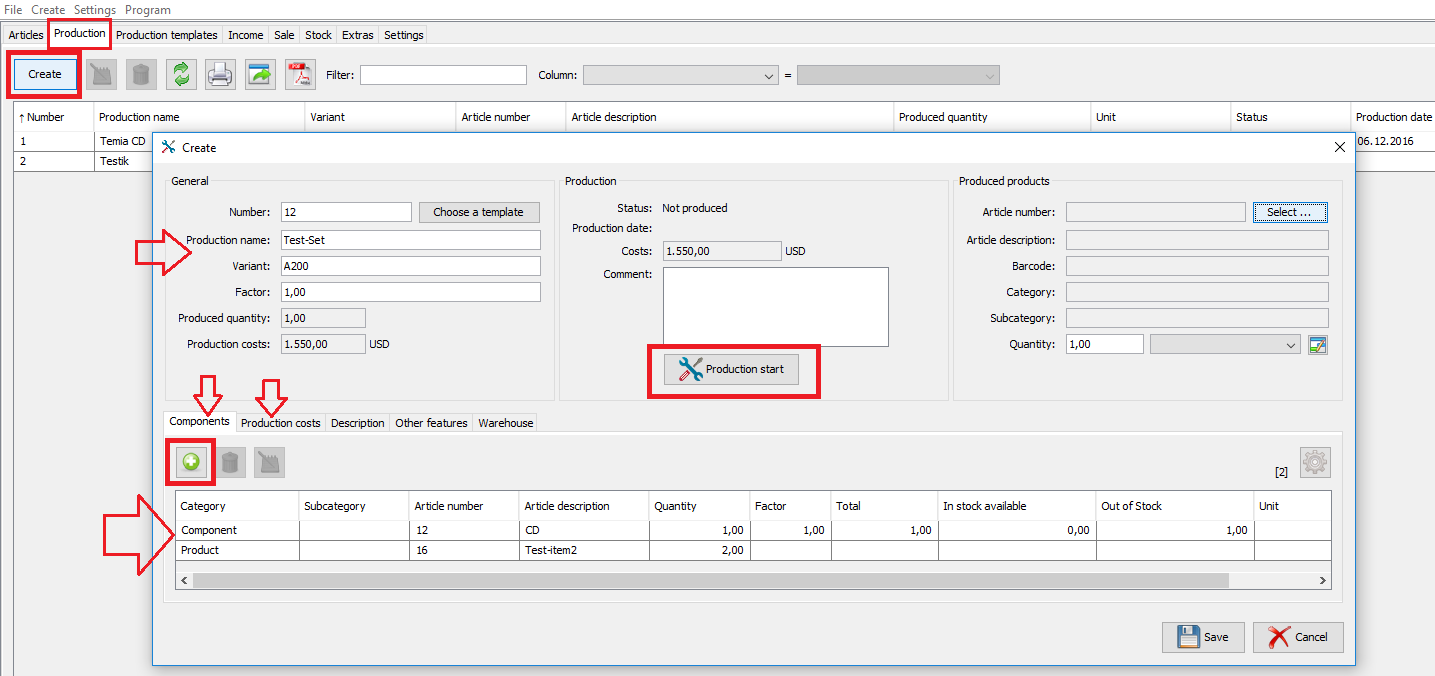
Step 4: Production Starting
If you didn´t do it before: at this step you can create new articles.
WINDOWS:
Do not forget to add the articles to the stock before the production starting (see step 3).
To start the production:
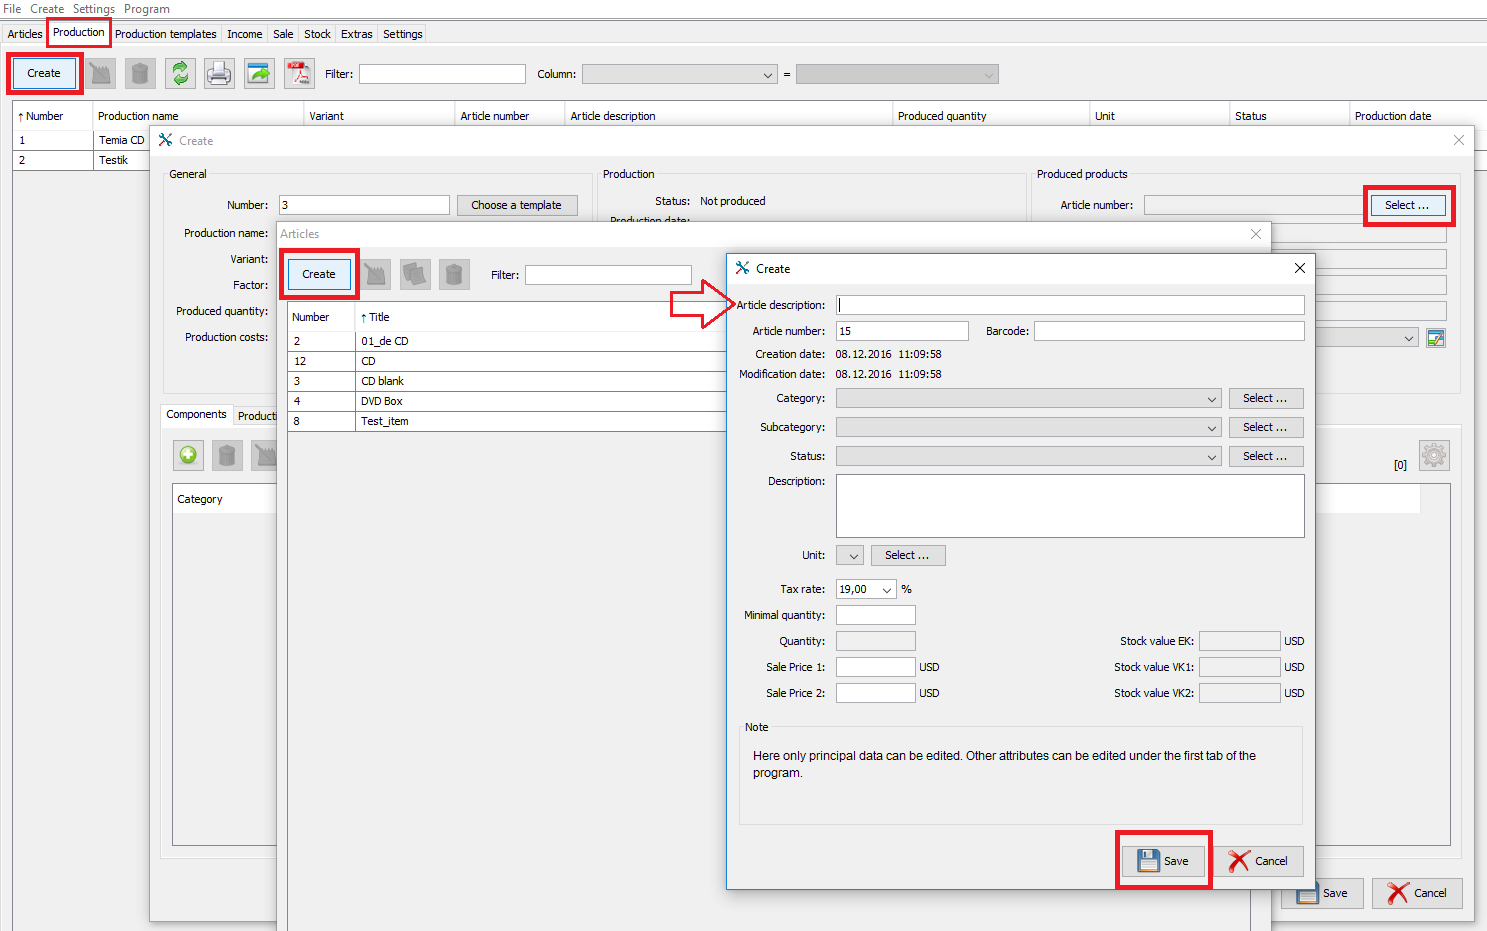
1) Open the “Production” tab.
2) Click the “Create” button.
3) In the newly opened window choose a production template or perform the production without a template.
4) Fill in the information to the production.
5) Put all components, which you want to use in your production.
6) Click the “Production start” button.
WINDOWS: